
Lesson 3 of 9
User Interface
This tutorial demonstrates how to create a web user interface (UI) for your web application after uploading your workbook. The user interface creation…
2 min readThis tutorial demonstrates how to create a web user interface (UI) for your web application after uploading your workbook. The user interface creation involves defining the input field types, and which named ranges they correspond to, and the content fields where the calculation results are going to be shown. The web interface of a web application is created through a drag-and-drop style builder in the Designer Interface, where you can add input and output modules into application pages.
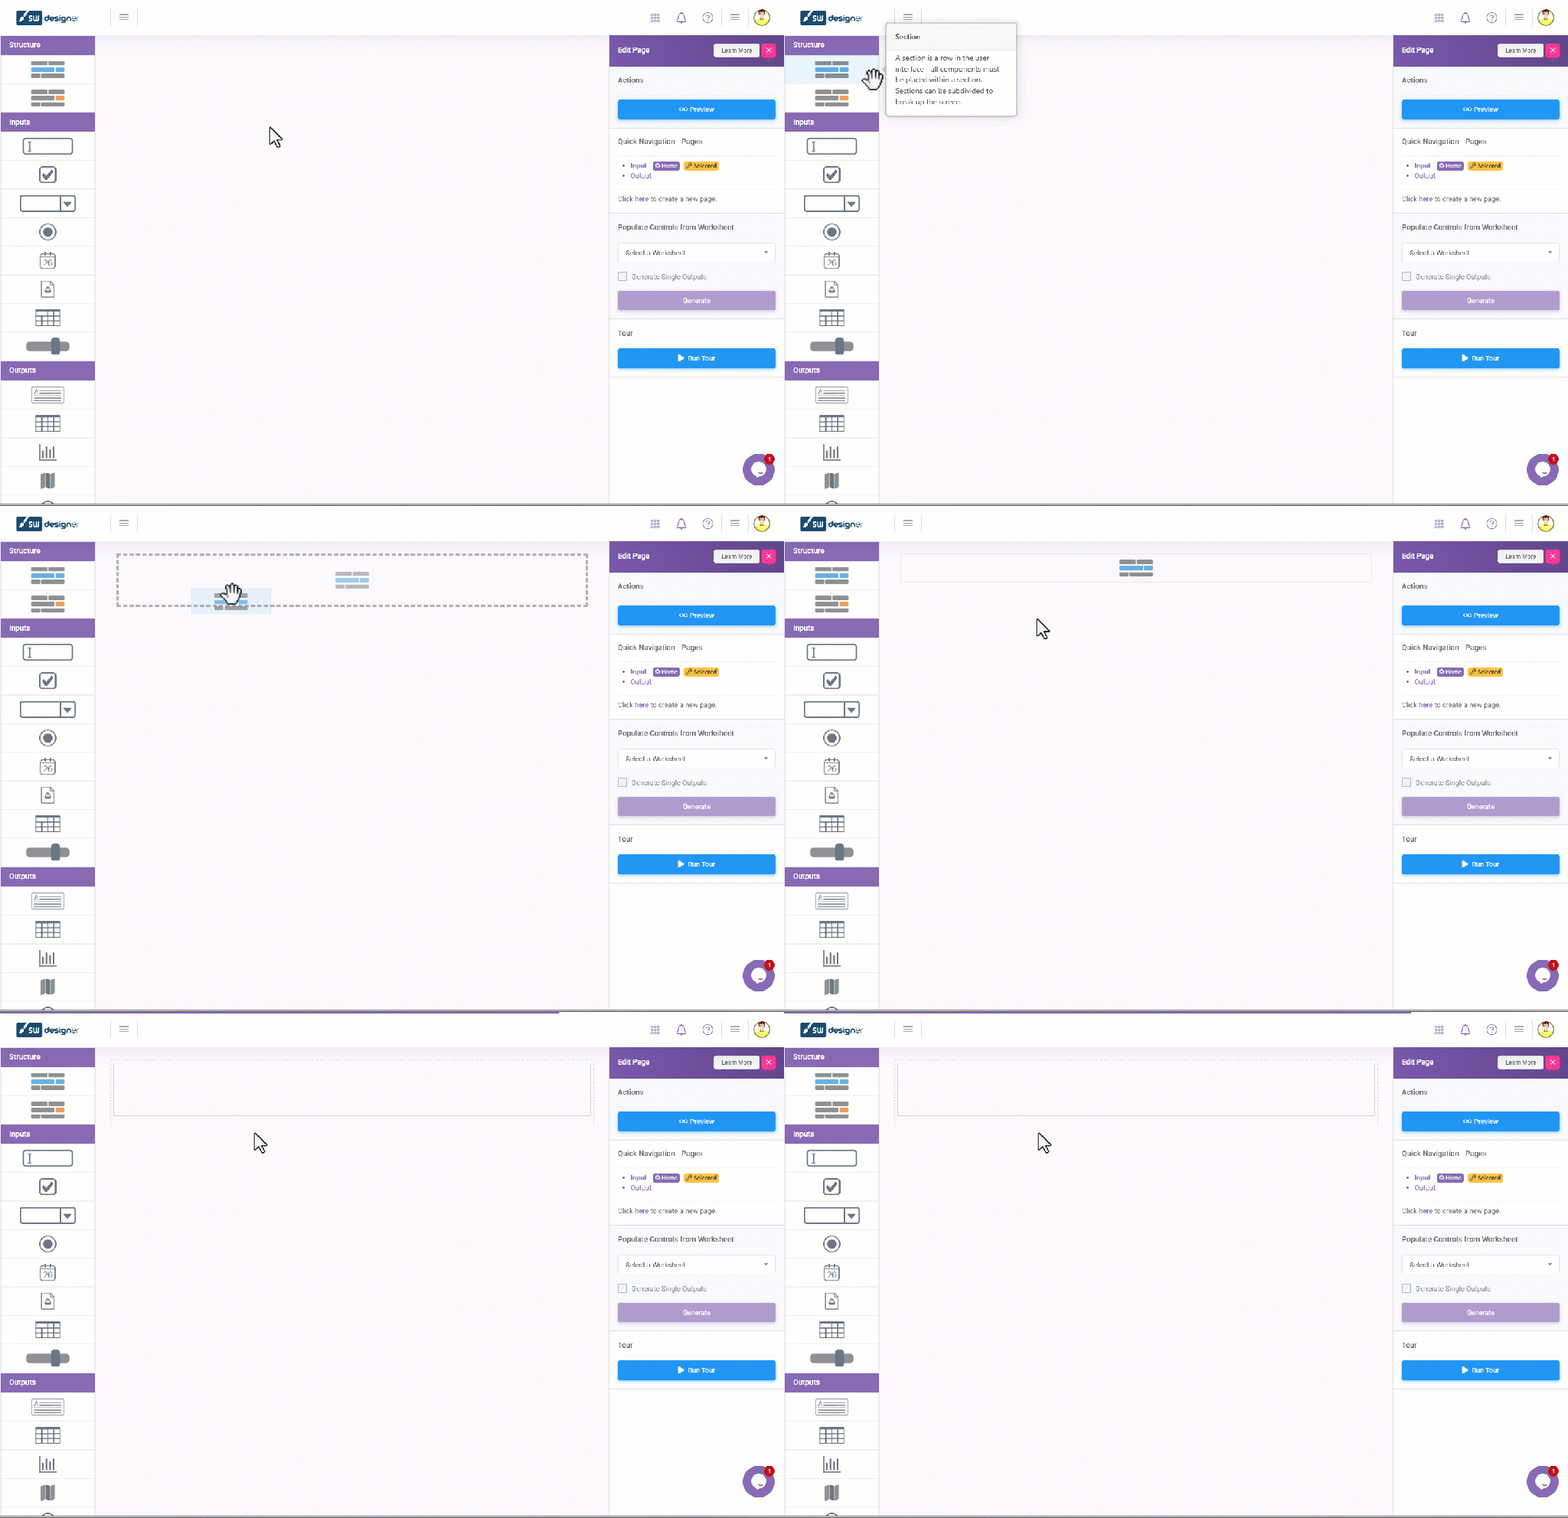
All input and output modules must be placed inside Container****s, inside Sections. A Section module will always come with a Container inside it. You can think of Sections as rows, and Containers as columns in the page structure.
Begin by adding any number of Sections into your page, and then drag and drop the other modules inside the Container.
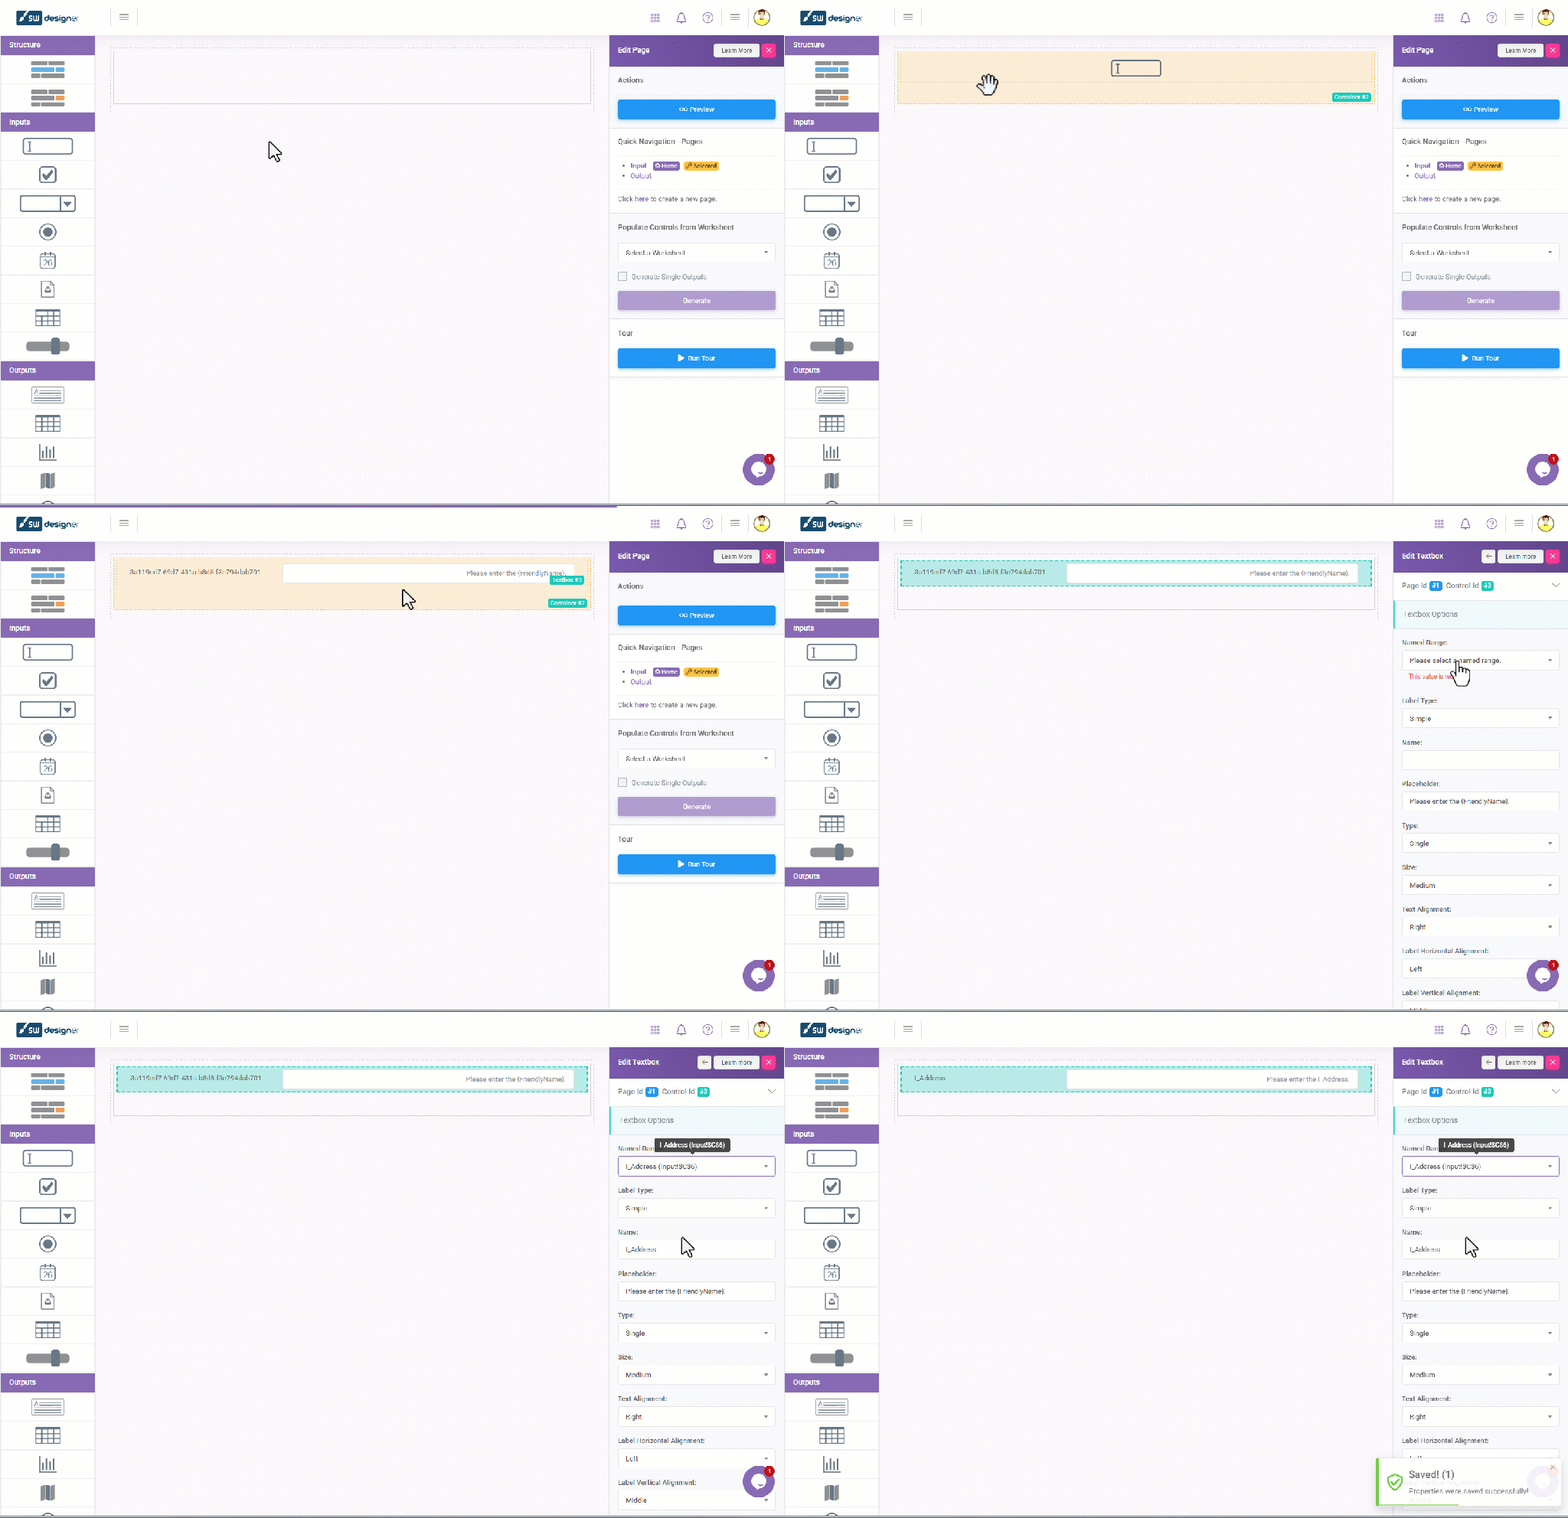
You can change the properties of a section, container, or module by clicking it, and then configuring from the menu that appears on the right. When you add an input module, make sure to assign a Named Range by clicking the control, and selecting the name from the Named Range field for that control.
Note that you can only edit one page at a time. If you add more pages to your web application from the Pages interface, you will be able to select the active page from the Contextual menu on the top right corner.