
Lesson 1 of 6
Legacy platformBegin Conversion
After the installation of SpreadsheetWEB conversion wizard, a new item called SpreadsheetWEB will be added to the Excel menu. It shows up in the top tab as…
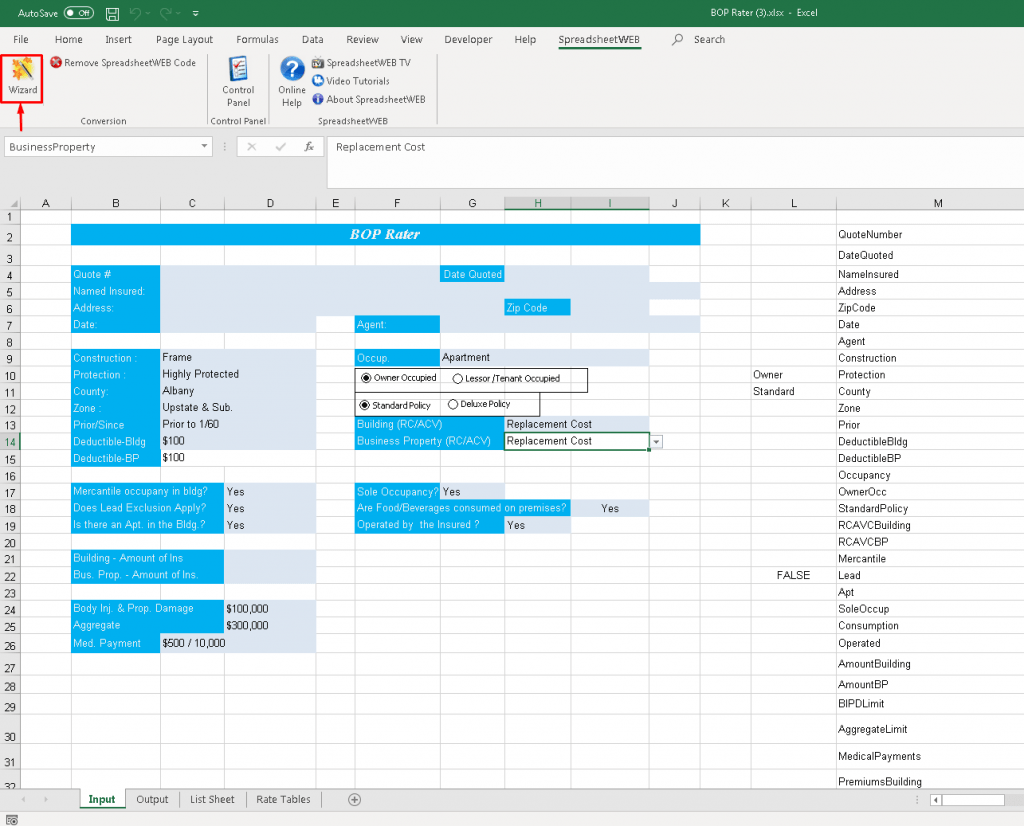
2 min readAfter the installation of SpreadsheetWEB conversion wizard, a new item called SpreadsheetWEB will be added to the Excel menu. It shows up in the top tab as a “ribbon”. Opening this ribbon will display a screen identical to the image below in the Excel interface.
Click on the “Wizard” icon in the ribbon to get started.
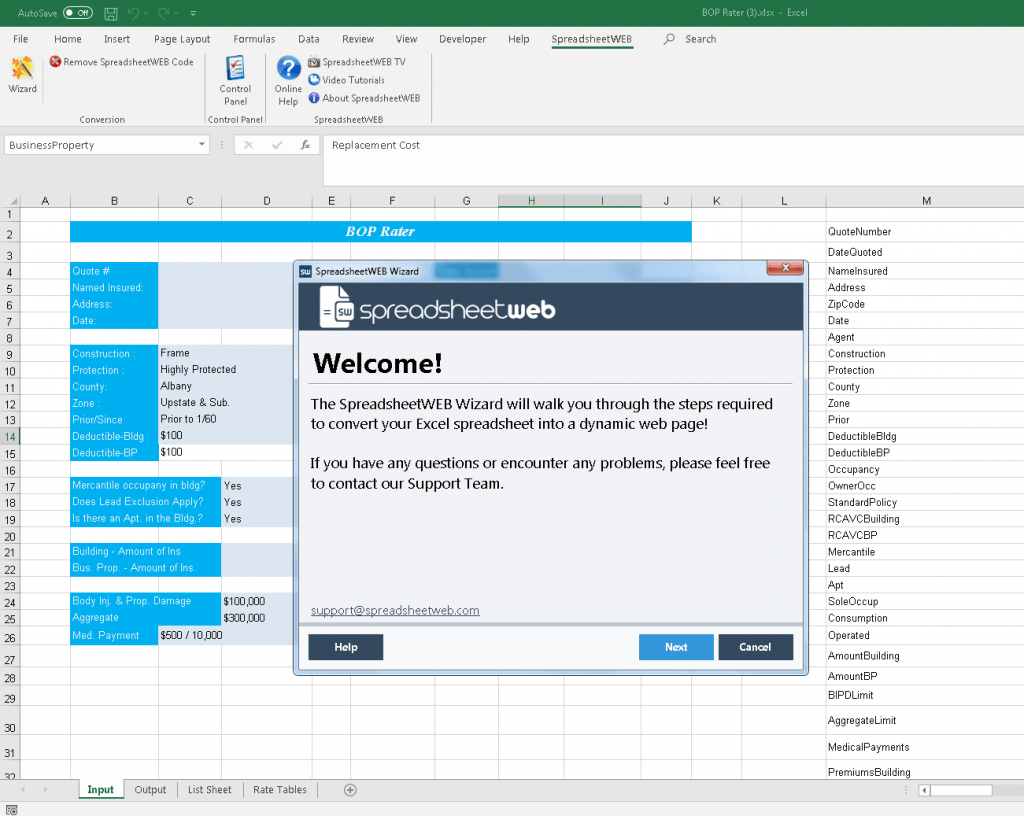
SpreadsheetWEB’s Welcome Screen will appear. Click “Next” to continue.
Name of the Web Application
Start the conversion by entering a name for the web application in the text field ‘Application Name’.
Add worksheets
When you start a new conversion, the box below ‘Worksheet(s)’ will be empty. To add a worksheet to the application click on the ‘Add’ button below the Worksheets box. After you have defined all settings for this worksheet, the wizard will return to this screen, where you can add additional worksheets or edit existing ones.
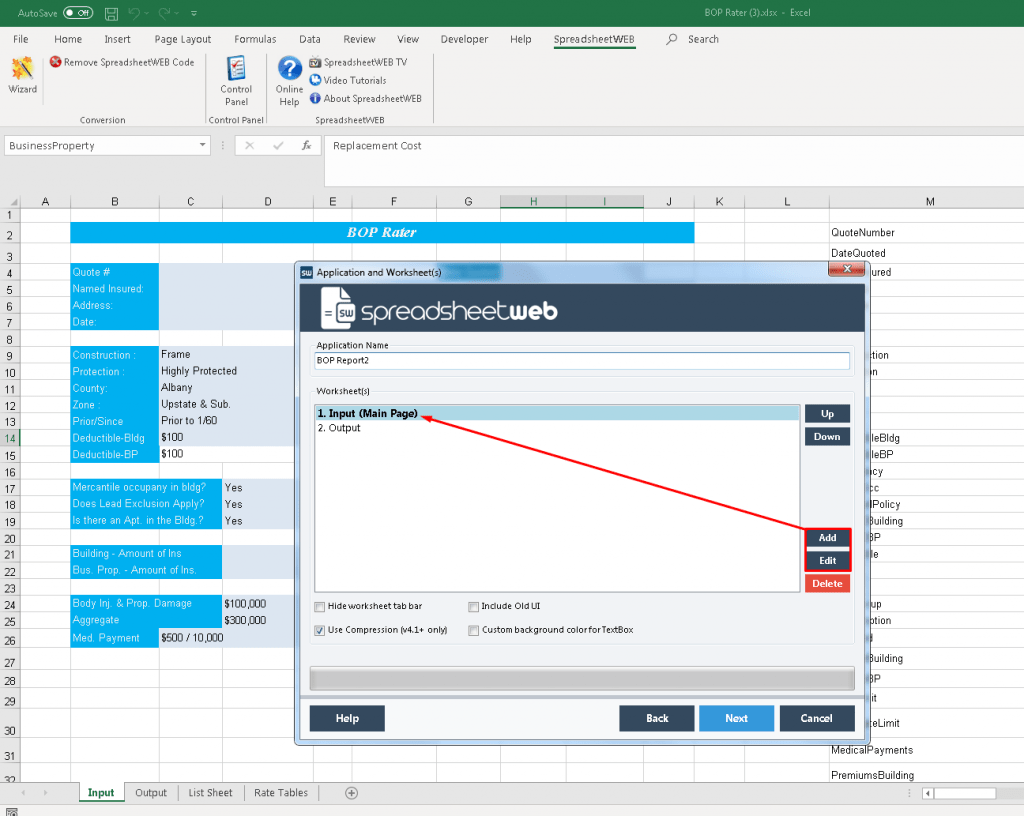
You can only upload your application when you have added at least one worksheet. To upload the application and your Excel file, click ‘Next’. This will take you to the following step where you can first preview your application and then upload it.
Worksheet Tab Bar in Multiple Worksheet Applications
When you add more than one worksheet to your application, SpreadsheetWEB will add a worksheet tab bar to the top of the page (visible area). This tab bar works very much like the worksheet tab bar you know from Excel: it allows you to navigate between worksheets.
Change the Order of the Worksheets in the Worksheet Bar
Use the buttons ‘up’ and ‘down’ to change the order of the worksheets in the worksheet tab bar.
How to Select the Display Area
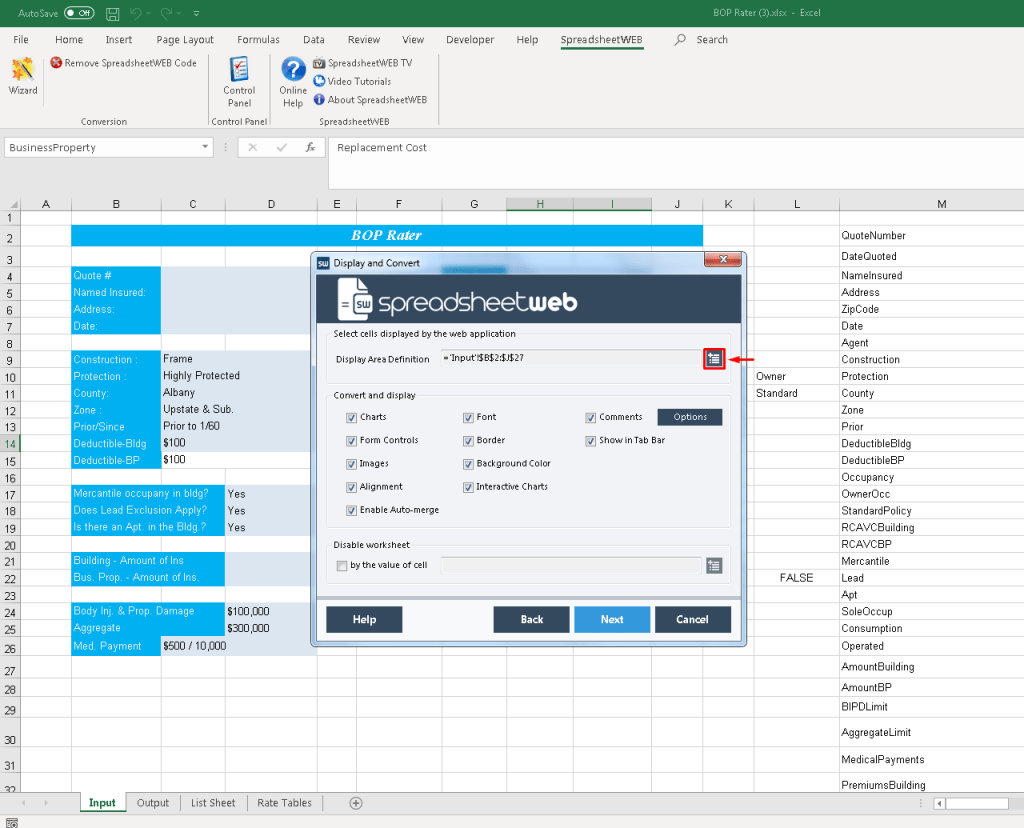
In this step, you will select the range of cells, or the ‘Display Area’, that is going to be displayed on the web application. You can also decide if you wish cell formatting to be preserved and whether charts, images and form controls will be converted or not.
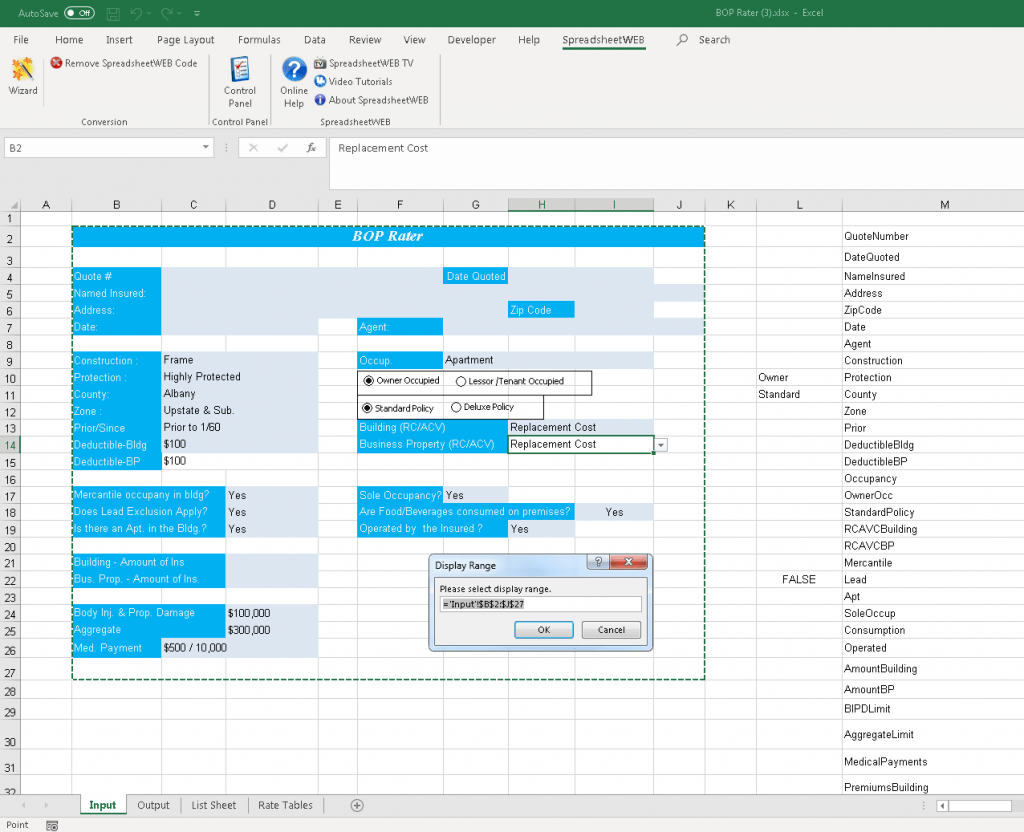
Selecting a display area, identical to selection tool as in Excel
To select the range of cells that you want to include in your web page, click the selection ( ) button. A pop-up window will appear and you will be asked to make a selection – just like in Excel.